Membrane Detector
Automatic image segmentation using a train-and-predict scheme based on random forest classification.
Overview
The Membrane Detector is a pixel classifier for automatic image segmentation, based on Random Forest for Membrane Detection by Verena Kaynig, using the randomforest-matlab library by Abhishek Jaiantilal.
It excels at segmenting complex datasets where global thresholding fails due to varying background intensities or subtle intensity gradients.
Launch via Ribbon → Tools → Classifiers → Membrane detector.
Interface
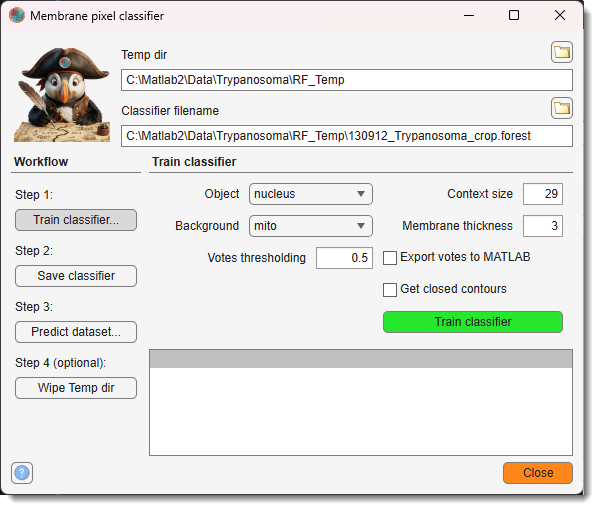
The tool is divided into:
- Top fields — paths for the temp directory and classifier file
- Workflow panel — step-by-step guide to training and predicting
- Train classifier panel — training and prediction settings
- Log list — progress messages from the last operation
File paths
- — directory for temporary feature files (
.fm) generated during training and prediction. Defaults toRF_Temp/next to the open dataset. Use the browse button to change it. - — full path to the
.forestclassifier file. Use the browse button to pick a location.
Workflow panel
Guides the four-step process.
Step 1 — (toggle): activates Train mode. Training controls in the Train classifier panel are enabled. The main action button reads Train classifier.
Step 2 — : saves the trained classifier to the file specified in .
Step 3 — (toggle): activates Predict mode. Training-specific controls are disabled; appears. The main action button reads Predict dataset.
Step 4 (optional) — : deletes all files in to free disk space.
Warning
Wiping the temp directory is irreversible. Make sure the temporary files are no longer needed before proceeding.
Train classifier panel
Settings used for both training and prediction.
- — model material that marks the object (e.g., membrane).
- — model material that marks the background.
- — context window radius in pixels for feature extraction. Smaller values suit short or highly curved structures; larger values capture more context.
- — expected thickness of the target structure in pixels.
- — threshold applied to the classifier vote probability (0–1) to produce a binary result. Values closer to 1 require stronger classifier confidence.
- — exports the raw per-pixel vote probability map to the MATLAB workspace as
mibVotesafter each training or prediction step. - — applies skeletonise + dilate morphological closing to the prediction, useful for enforcing closed membrane outlines.
- (predict mode only) — runs prediction on the currently displayed slice as a quick preview. Results appear in the Selection layer.
- / — the main action button. Its label changes with the active mode:
- Train mode: trains the classifier on the current slice using the labeled materials.
- Predict mode: runs prediction across the entire dataset (or the subrange shown in the log).
Step-by-step example
This example segments endoplasmic reticulum from a time-lapse widefield dataset where global thresholding is ineffective due to background intensity gradients.
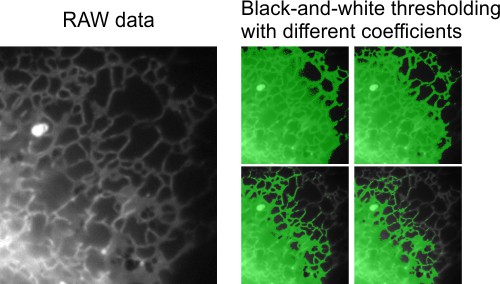
1 — Label training areas
- Start a new model in the Segmentation panel with
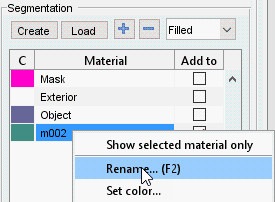
- Add two materials with and rename them Object and Background
Snapshot
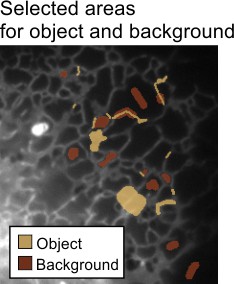
- Use the Brush tool to mark regions:
- Select endoplasmic reticulum profiles → press to add to Object
- Mark background areas → press to add to Background
Snapshot
2 — Train the classifier
- Launch via
Ribbon → Tools → Classifiers → Membrane detector - Set to Object and to Background
- Adjust and as needed
- In Step 1, click to activate train mode
- Click to train on the current slice
Snapshot
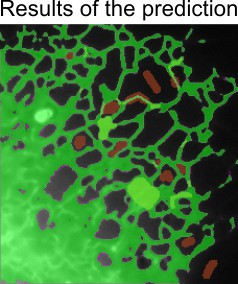
- If the result is unsatisfactory, add more labels (across multiple slices if needed) and retrain
- Once satisfied, click (Step 2)
3 — Predict the whole dataset
- In Step 3, click to activate predict mode
- Use to preview the result on the current slice
Snapshot
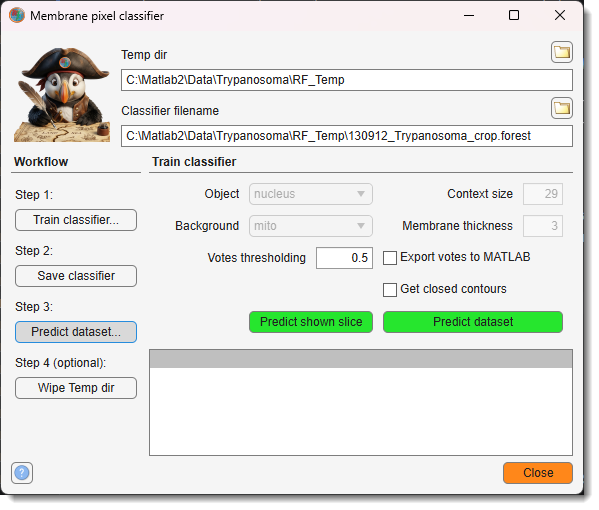
- If acceptable, click to process the full dataset
Prediction results are written to the Selection layer. Transfer them to the Mask or Model layer for further refinement or saving.
4 — Clean up
- Click (Step 4, optional) to remove the large feature files generated during prediction.
Batch scripting
This tool supports batch scripting for automation.
Example
% Train on the current slice
BatchOpt.Mode                 = {'trainClassifier', {'trainClassifier','predictDataset'}};
BatchOpt.ObjectMaterial       = {'Object'};
BatchOpt.BackgroundMaterial   = {'Background'};
BatchOpt.ContextSize          = {29, [1 Inf], true};
BatchOpt.MembraneThickness    = {3, [1 Inf], true};
BatchOpt.VotesThreshold       = {0.5, [0 1], false};
BatchOpt.ExportVotes          = false;
BatchOpt.SkelClosed           = false;

obj.mibController.startController('controllers.MembranePixClassifier', [], BatchOpt);

% Predict the full dataset
BatchOpt.Mode{1} = 'predictDataset';
obj.mibController.startController('controllers.MembranePixClassifier', [], BatchOpt);
References
- Random Forest for Membrane Detection by Verena Kaynig
- randomforest-matlab by Abhishek Jaiantilal
Back to MIB | User interface | Ribbon | Tools